Pages

Wednesday, April 25, 2012

Grow Lemon Balm from Seed or Root Clump

Lemon Balm can - and will - grow anywhere.

I have limited growing space in my current location, but I simply cannot imagine a Summer without Lemon Balm. This is another herb so tasty and easy to grow that there is really no reason to exclude it from your gardening plans.

Lemon Balm for You:
A mild sedative, Lemon Balm is invaluable for the restless mind, especially for children and the elderly (Lemon Balm tea does wonders for anxious Alzheimer'spatients). However this effect is very gentle, and Lemon Balm can be enjoyed any time of day. A known antiviral and tummy tonic, this herb is an ideal cold and flu treatment. Lemon Balm makes a wonderful sun tea, smoke additive and herbal bath. One sniff of this herb and you'll want to try it in everything!

Lemon Balm for Your Garden:
Lemon Balm was once considered a sacred plant due to it's abilities to attract bees. This makes it a wonderful addition to a garden bed, particularly with tomatoes. Its aromatic nature is also said to deter pests, including mosquitoes. One thing to be aware of is that Lemon Balm, like other plants in the mint family, is quite hardy and will spread wherever they can. If you live near a wild place, you may want to grow your Lemon Balm in a container so that it doesn't overgrow native vegetation (I've come across huge patches of Lemon Balm in the middle of the woods). However, if you live in the city like me, the only thing Lemon Balm has to compete with is lawns. Personally, I'd rather have more Lemon Balm!

How to Grow Lemon Balm:
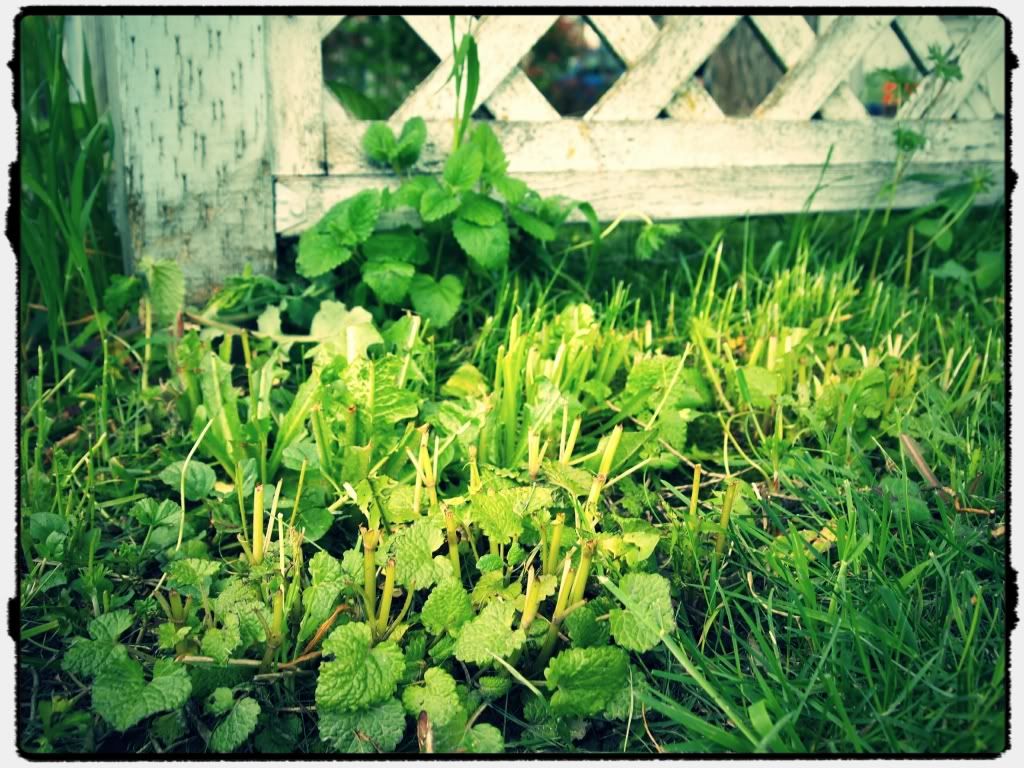
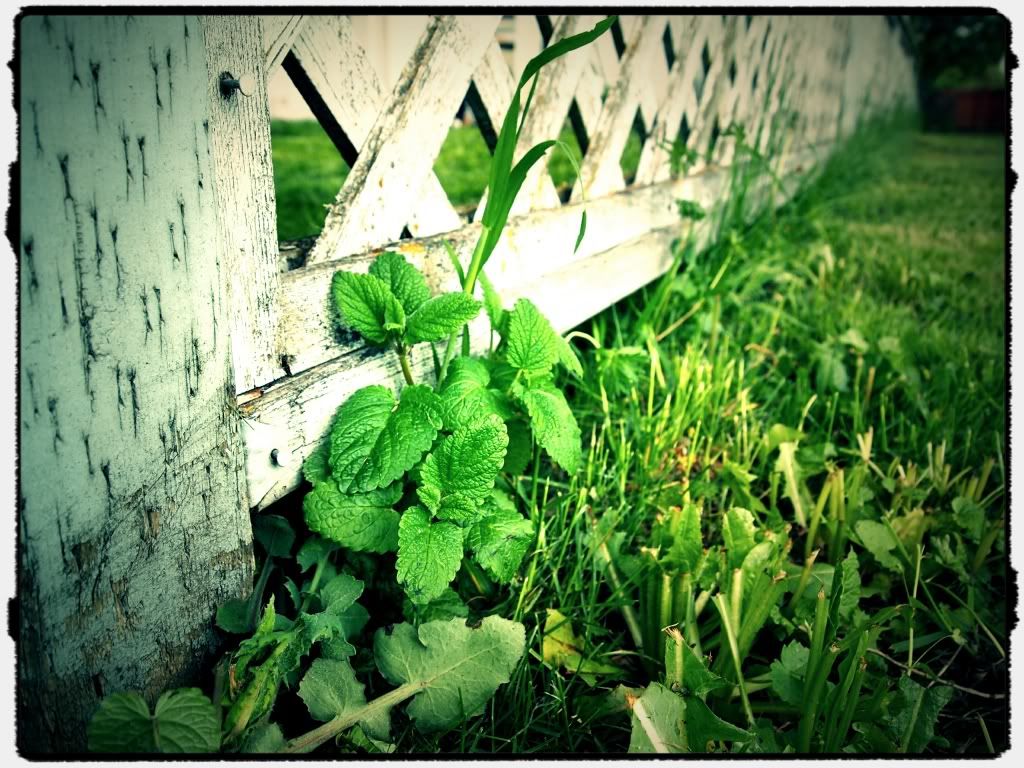
My mow-happy neighbor decimated the Lemon Balm patch growing in the the vacant lot next door. Good thing Lemon Balm is persistent, these chopped up patches are being moved to my yard!

Step 1: Pick a Spot
Containers suggested for wild spaces. City folks, plant it everywhere! There's nothing that brings me more joy than walking down a city sidewalk and brushing up against an overgrown patch of Lemon Balm. Most people don't notice they have such a useful plant taking over their yard. Like most herbs, Lemon Balm is not picky. It loves sun, but will also thrive in shade. It's best to wait a few weeks after your last frost to plant Lemon Balm. It will come back every year, so a fall planting is also appropriate.
The lawn had overgrown a planting area near my front patio, so I took a shovel to the grass and loosened it up about 6" deep. I also put down a 2" layer of topsoil.

Step 2: Soil/Container Prep
Loosen your dirt a bit and/or throw down a 2" thick layer of topsoil. Container gardeners, a 5 gallon bucket will give you a big and beautiful plant, but don't hesitate to give it a try in any pot you have around. I once had Lemon Balm growing on a windowsill in a 1/2 gallon planter.
Tiny Lemon Balm seeds.
A root clump salvaged from the massacre site.

Step 3: Plant it!
Lemon Balm can be grown from seed, but it grows very quickly from root clumps. If you spot some feral Lemon Balm growing in your neighborhood, you can dig up a clump and start a patch in your own yard (Lemon Balm is frequently found in vacant lots, but be sure that you aren't digging up a cared-for patch). For seed starters, I prefer either a local seed company or Botanical Interests, not only because they have high sustainability standards, but their packages are both informative and beautiful! Lemon Balm, like other mints, have super tiny seeds that are simply pressed into the surface of your loosened dirt. Gently water your seed bed, being careful not to scatter those little seeds.
Much better!

Step 4: Take Care
Seeds germinate in 10-15 days. They can be thinned to 12" apart when 1" tall, but it's not necessary. Root clumps should take off quickly. Use the leaves as needed. Lemon Balm can be severely cut back and will happily return. When I find a large patch of feral Lemon Balm, I cut back whole stalks (3'-4' tall) and hang it upside down in big bunches to dry. If it's still early in the season, they'll grow right back!

Since Lemon Balm leaves can be picked as needed, next week I'll share some of my favorite Lemon Balm recipes, like my Sweet Meadow Smoke Blend:

*This information has not been evaluated by the FDA and does not replace the opinion of a doctor. This product is not intended to diagnose, treat, cure, or prevent any disease.

Wednesday, April 18, 2012

Growing Calendula for You and Your Garden

If you're looking to add herbs to your garden and your pantry, Calendula is a must. Not only is it ridiculously easy to grow, it also has an array of benefits for yourself and your garden. Both Calendula officinalis (Pot Marigold) and Tagetes erecta (Mexican or Aztec Marigold) have similar traditional uses.

Calendula for You:
Heals and soothes just about any skin abrasion, rash, cut, burn, infection or cosmetic problem like varicose veins. Internally, Calendula tea or tincture treats cuts inside the mouth, sore throats and even stomach ulcers! The petals look beautiful tossed with salad greens. Calendula is a known antiviral, antifungal and antibacterial herb. It's definitely in my top ten favorite herbs because it is so gentle, yet so effective. Calendula is an invaluable aid for keeping your skin healthy.
My Intensive Care Healing Salve draws part of it's power from Calendula-infused oil (recipe will be shared in a future Calendula harvest post).

Calendula for Your Garden:
Pot Marigold is a classic companion plant. Its scent will drive away pests, including Mexican Bean Beatles, Aphids, Tomato Hornworms and other nasties. Calendula helps everything, really, so don't hesitate to throw it around the garden. Tagetes erecta is known to protect plants from nematodes specifically.

How to Grow Calendula

Step 1: Pick a Spot
I chose a spot near my front door where the grass was overgrown.
Calendula is a prolific self-seeding annual growing from 1'- 3' tall. It's not picky (tolerates poor soil) and grows easily in partial shade, full sun, even patio pots (container gardeners, listen up!).
It can be planted pretty early in Spring, depending on where you live. Ideal germination temp is 59 - 68 degrees (F). They wont survive a hard frost, but are easy to cover when young. Calendula transplants well, so if in doubt you can always start yours indoors. I probably could have planted mine earlier here in Southern Oregon, but with the first blooms arriving in 40 to 50 days, there's really no need to stress.
Step 2: Soil/Container Prep
You don't need to do much to make Calendula happy. Loosen up the soil (6"-12" if you can) by jamming your shovel in the Earth and tilting it up just a bit. I like to get dirty, so I usually end up sifting through all the dirt by hand. Break up any clumps and remove rocks. If your soil texture isn't ideal, you can mix in some store-bought topsoil. The more work you do here the better for your plants, but Calendula will forgive your laziness. Set aside some sifted soil, enough to cover your planting area 1/4" deep.
Container gardeners will want to line the bottom of the pots with some small rocks or gravel for drainage. If you give Calendula a nice big 5 gallon bucket, she'll reward you with lots of blooms. But any container will do, really. If the plant looks crowded as it grows, transplant!
Soil sifted and ready to wet. I set the grass aside to die, I'll use it as mulch later on.
Step 3: Plant it!
Once your soil is sifted and smooth, thoroughly wet the entire area. Then, sprinkle your Calendula seeds across the top and cover with the sifted soil you set aside. Calendula needs a 1/4" covering, just enough to keep dark. Gently pat down your dirt and moisten your top layer with a spray bottle or watering can. Try to avoid traumatic watering as this will uncover your seeds and they may not sprout.
Step 4: Take Care
Seeds germinate in about ten days. I'm more of a hap-hazard gardener, throwing several herbs together in a patch and "letting the seeds fall where they may." I like my gardens to resemble wild spaces, with a mish-mash of edibles, medicinals and pretty things all growing together. If you'd like more order in your garden, feel free to remove any weeds and when your plants are 2" tall, thin so that there is 6"-12" between each plant. You'll be enjoying your first blooms in just 40-50 days!
I mixed my Calendula with Yarrow, Borage and a beneficial bee flower blend.
Calendula is the perfect herb for beginners and children, but it's also a staple among veteran gardeners as well. It's hard to go wrong with this beautiful and useful flower, so throw all caution (and seeds) to the wind. Check back here soon because before your plants are blooming, we'll have a harvest post complete with recipes for classic Calendula.


Wednesday, April 11, 2012

Container Gardening Cheap and Simple


A huge heriloom tomoato from one of my plants grown in a 5-gallon bucket!
I dream of having the perfect garden.Stone paths, ponds and raised beds all overgrown with medicinal herbs, edible perennials and tasty annuals. My future garden will look like it's been there for years, arguably forever, in a  cyclical state of decay and renewal. I'll know it like the back of my hand, probably because my hands will be forever buried in dirt and mulch until my garden is just what I want it to be.
But I'm not there yet. I've spent the past two years working hard and saving to buy my first house (and garden space). I love gardening so much, I couldn't let the limitations imposed by city living and landlords stop me from having fresh tomatoes and herbs. The house I was renting had a small enclosed deck, perfect for a mish-mash of veggies and flowers. Here I gardened for two Summers. Here's how I did it cheap and simple:

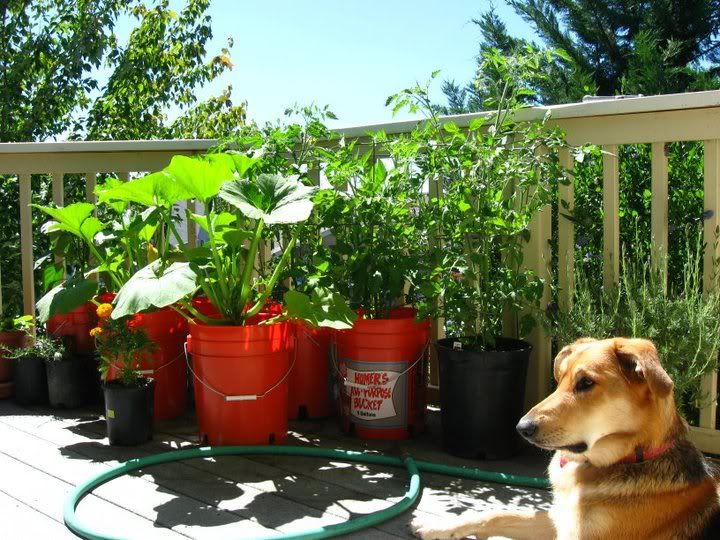
My first-year container garden (Dog shown for scale).
The first hurdle in container gardeningis finding affordable containers. Ceramic planters are expensive, heavy and breakable, a less-than-ideal combination. Wood is a great choice if you'll be in one spot for a while, but plastic is easiest and most affordable. There's no need to pay for overpriced plastic planters if you aren't worried about looks. Five gallon buckets are perfect for tomatoes and peppers of all kinds. I got mine brand new for $3 each. Plus they have a built-in handle! For drainage, I heated up a butter knife over a candle and cut little squares along the bottom and lower sides. If you have a drill handy, you can also drill a bunch of drainage holes. Drainage is a must for container plants, so make sure there are plenty of holes on the bottom of your pots. For bigger plants like squash and mini herb gardens I picked up some round 20-gallon tubs for $6 each. These have nice rope handles on either side for dragging your plants around. Another option is plastic storage bins. You can often find these for a couple dollars at thrift stores (especially when they're missing the lids!).

Drainage holes cut with a hot butter knife.
Next, you need to find a good spot to keep your plants. Most veggies need full sun, at least 6 hours a day. Depending on your bioregion, you may need to protect your plants from the cold or heat to extend your season (which is easier when you can move your veggies around). If you have a shady patio, choose plants that prefer less sun. If you want to start plants indoors, choose a sunny south-facing window. The nice thing about container gardeningis it doesn't require a whole lot of time or planning, so feel free to experiment. Even if you don't get many veggies you'll at least have another house or patio plant.

This is what I moved from my old house. Mostly herbs and Green Onions!
Here's a quick list of easy-to-grow container veggies:
Peas
Radishes
Lettuce
Kale
Carrots
Tomatoes
Cucumbers
Eggplant
Green Onions
Summer Squash and Zucchini
It's super important to fertilize your potted plants regularly since their roots only have access to the dirt they're sitting in. My preferred method is making "compost tea" in an empty milk jug. Simply put a couple handfuls of fertilizer/manure in your jug, add water and set it in the sun for one day. Use this just like any liquid fertilizer.
And don't stop at veggies! Herbs are a wonderfully low-stress way to learn about gardening. Most are prolific and don't need to fruit before using them. Many herbs can be grown in small containers near a sunny kitchen window. I even took on growing Echinacea (which takes two years to mature before harvest) in a container last year. I brought it with when I moved and am anxiously awaiting its purple blooms.
 
Second-year baby Echinacea!
If you are low on space, time, experience or ambition, container gardening is a perfect outlet for your need to get your hands in the dirt.

Also posted on www.cookingmycsa.com

Tuesday, March 20, 2012

Wild Rose Turns One!


This March we celebrate the one-year anniversary of Wild Rose! Wild Rose is the culmination of six years of experimentation and alchemy by our founder and formulator, Ash. Ash intuitively formulates our unique products using the best, most ethically-produced ingredients available. Ash is entirely self-taught, and has learned the alchemical arts of aromatherapy and herbalism since 2006. With over 3,000 sales on Etsy in our first year, we're looking forward to many happy returns!

Sunday, July 24, 2011

Douglas Fir Bark Baskets

I've been making bark baskets from young Douglas Firs for many years, but have only recently managed to get some up on Etsy. I usually get a lot of questions about the process, so here's a photo journal of bark collecting. Next time I harvest, I'll be sure to take pictures of the basket making process, too!

Douglas Fir Bark Baskets by Wild Rose Herbs
Each Douglas Fir used for basket making is harvested with an understanding of deep forest ecology. Clear cut forests are often reseeded with fast growing Douglas Firs, creating a dangerous fire hazard throughout the West. Douglas Firs often shade out slower growing native species and destroy forest diversity. I only cut trees that are crowding out other trees, thus reducing fire hazard and promoting forest diversity. 

This particular tree was crowding out a Cedar at least twice it's age. The fast growing Doug Fir would have shaded out and killed the Cedar if left on it's own, taking away forest diversity. 


After the tree is cut, the limbs are removed as close to the trunk as possible. This limits the risk of bark being snagged on a limb stump during peeling. Once the tree is ready, the initial cuts must be made. The length of bark you decide to cut should be a little more than twice the length of the basket you want to make (since the bark will essentially be folded in half). Make two cuts around the circumference of the tree, and then one long cut running the length of the tree connecting the first two cuts. Make sure your cuts go all the way through the bark and keep your knife handy during the peeling process!

Cuts made, ready to peel.
Loosening the bark. Do this VERY slowly. Loosen bark all the way around "holes" (where branches once were) until the bark "pops" off around the hole.
My small hands work well for peeling, but it may be easier to use a thin piece of wood, butter knife etc. for peeling.

Keep your knife handy, should you find any spots that weren't completely cut.
A crucial point-great care must be taken to loosen the bark around any holes on the underside of your tree. The bark could very easily stick and tear during this time.
Careful.. careful...
Pops right off!

Next time I harvest bark, I will do another photo journal detailing the basket making process!
Here's a few of my latest creations:
Douglas Fir Bark Basket by Wild Rose Herbs

Douglass Fir Bark Basket by Wild Rose Herbs
Bark should be peeled immediately before basket making. You can prolong the time before the bark dries by wrapping it in a garbage bag and storing it in the fridge. This will give you about 2-3 days to make your baskets before it dries out!


Thursday, July 21, 2011

Wild Rose Herbs Referral Contest!

Wild Rose Herbs' Very First Referral Contest!

In honor of the new Wild Rose Herbs Blog, I will be running a referral contest for a $15 store credit at Wild Rose Herbs! Here's how the contest works:

Participants will earn one point for doing any of the following:

*“Like” the Wild Rose Herbs Facebook page:
If you already “like” the Wild Rose Herbs Facebook page, you will earn one point.

*Follow the Wild Rose Herbs Blog using your Blogger/Google account
Please leave a message on the Wild Rose Herbs Facebook wall with your Blogger username after you follow the blog to limit confusion.

*Refer other folks to do either of the above and earn one point for each referral. You can do this easily by sharing this contest on your wall (or anywhere else you can think of-Etsy teams, your blog, etc!) and asking your referrals to post a message on the Wild Rose Herbs Facebook page stating that you referred them. They will also earn one point for liking the Facebook page. Post blog referrals on the Wild Rose Herbs Facebook Wall as well. Your referrals MUST post a message on the Wild Rose Herbs Facebook Wall to be included in your totals. Likewise, if you found this contest through another Facebook or Blog, you MUST leave a comment stating who referred you. You can only state the name of the first referral you received/saw. You cannot list multiple names and these types of messages will not be counted.

The person who earns the most points by the contest deadline, 11:59 pm August 7th (Pacific Time) will win the $15 Wild Rose Herbs store credit! This can be used for anything in the store, including shipping costs. Winner will be announced on Thursday, August 4th. I will post contest updates periodically on Facebook to show who is in the lead. If you would like me to leave your name/profile anonymous just let me know, and I will send you a message if you are in the top five or if you win the contest.
Contest begins now!

Saturday, July 16, 2011

How to Make Ginger Ale- A DIY Guide to Soda-Making

In honor of my new blog, and my newest listing since starting this blog, I've decided to share the full details/directions of my Ginger Ale Kit. Here's a link to the kit:


I'm not a big soda drinker, but on these hot days I love nothing more than drinking a naturally brewed, cold ginger ale, preferably near a river or lake. I'm rather sensitive to sugar, and often find store-bought sodas, even natural ones, to be far too sweet. I'm also a big fan of the magic of fermentation, and the idea struck me to share this knowledge in a simple kit that anyone can use. I'm starting with ginger ale, but I enjoy making a variety of herbal sodas that I will soon offer and share as well. 


Here are the direction (in full) that I provide with this kit. Enjoy!