Lemon Balm can - and will - grow anywhere.
I have limited growing space in my current location, but I simply cannot imagine a Summer without Lemon Balm. This is another herb so tasty and easy to grow that there is really no reason to exclude it from your gardening plans.
Lemon Balm for You:
A mild sedative, Lemon Balm is invaluable for the restless mind, especially for children and the elderly (Lemon Balm tea does wonders for anxious Alzheimer'spatients). However this effect is very gentle, and Lemon Balm can be enjoyed any time of day. A known antiviral and tummy tonic, this herb is an ideal cold and flu treatment. Lemon Balm makes a wonderful sun tea, smoke additive and herbal bath. One sniff of this herb and you'll want to try it in everything!
Lemon Balm for Your Garden:
Lemon Balm was once considered a sacred plant due to it's abilities to attract bees. This makes it a wonderful addition to a garden bed, particularly with tomatoes. Its aromatic nature is also said to deter pests, including mosquitoes. One thing to be aware of is that Lemon Balm, like other plants in the mint family, is quite hardy and will spread wherever they can. If you live near a wild place, you may want to grow your Lemon Balm in a container so that it doesn't overgrow native vegetation (I've come across huge patches of Lemon Balm in the middle of the woods). However, if you live in the city like me, the only thing Lemon Balm has to compete with is lawns. Personally, I'd rather have more Lemon Balm!
How to Grow Lemon Balm:
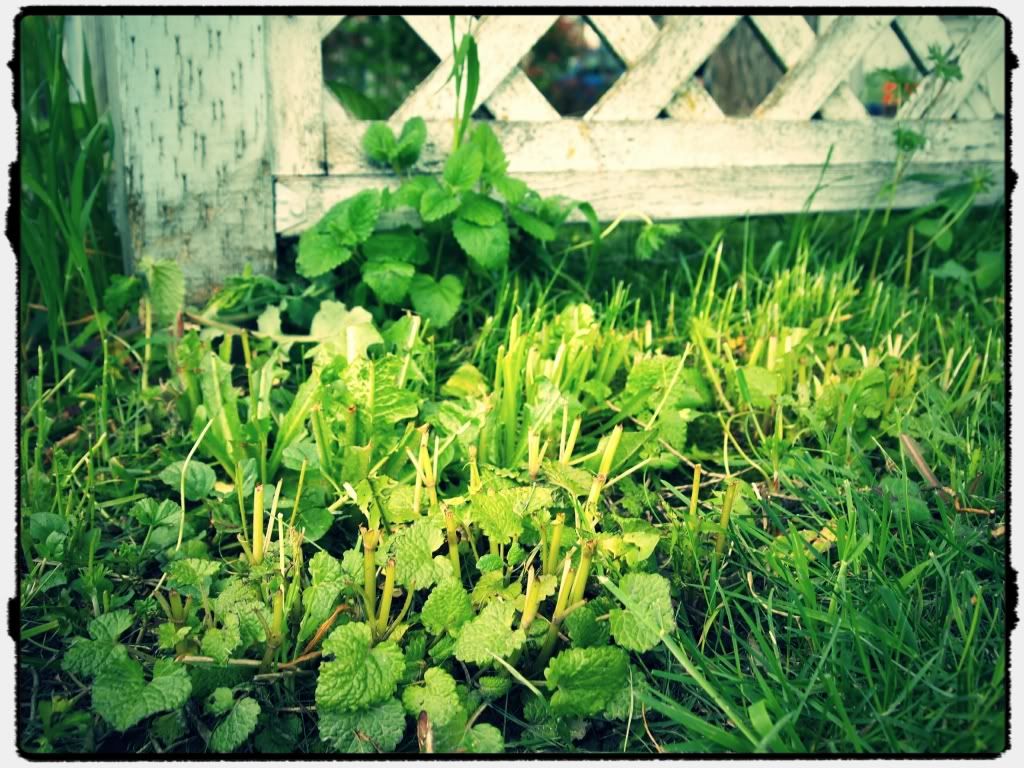
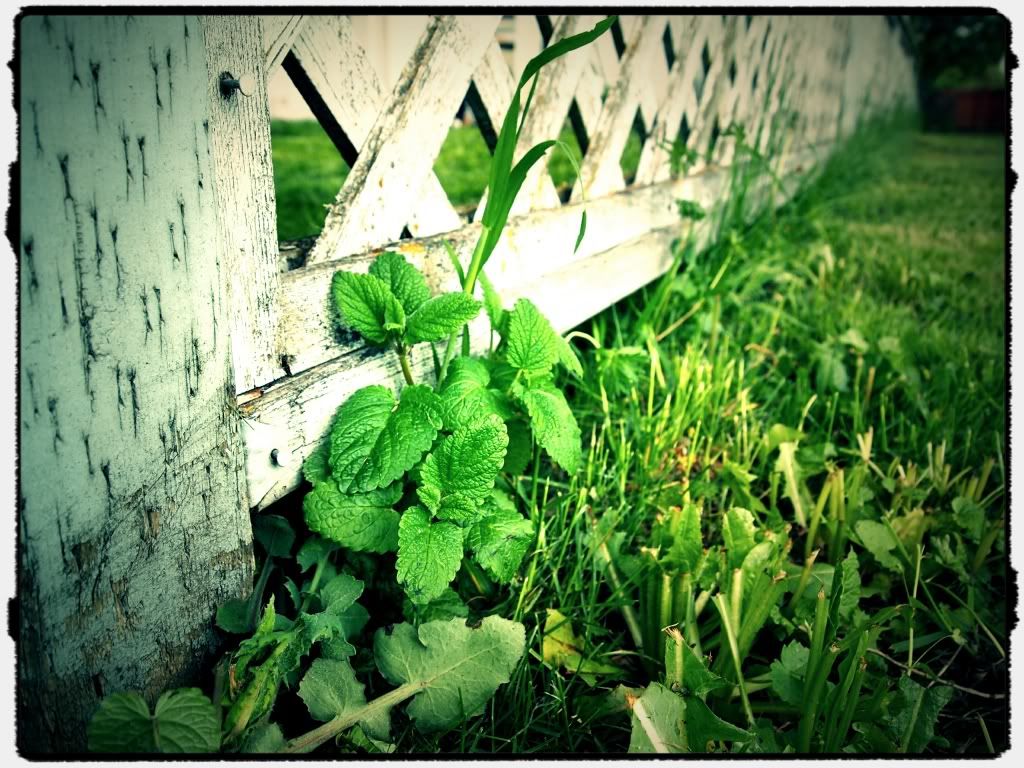
My
mow-happy neighbor decimated the Lemon Balm patch growing in the the
vacant lot next door. Good thing Lemon Balm is persistent, these chopped
up patches are being moved to my yard!
Containers suggested for wild spaces. City folks, plant it everywhere! There's nothing that brings me more joy than walking down a city sidewalk and brushing up against an overgrown patch of Lemon Balm. Most people don't notice they have such a useful plant taking over their yard. Like most herbs, Lemon Balm is not picky. It loves sun, but will also thrive in shade. It's best to wait a few weeks after your last frost to plant Lemon Balm. It will come back every year, so a fall planting is also appropriate.

The lawn had overgrown a planting area near my front patio, so I took a
shovel to the grass and loosened it up about 6" deep. I also put down a
2" layer of topsoil.
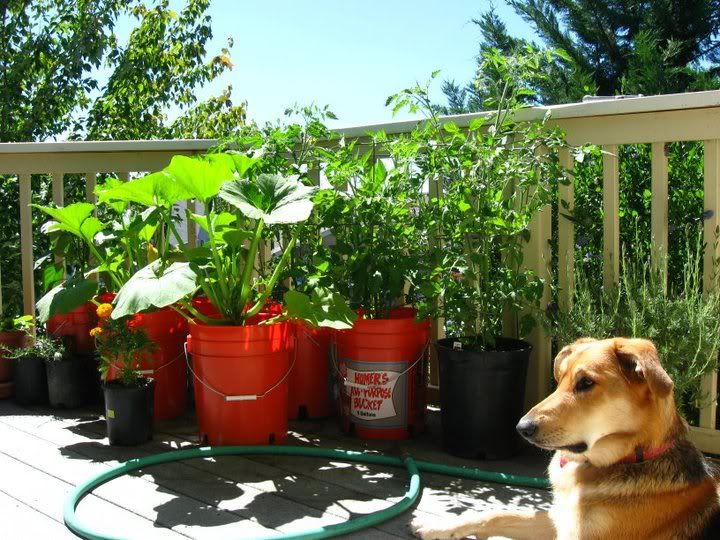
Step 2: Soil/Container Prep
Loosen your dirt a bit and/or throw down a 2" thick layer of topsoil. Container gardeners, a 5 gallon bucket will give you a big and beautiful plant, but don't hesitate to give it a try in any pot you have around. I once had Lemon Balm growing on a windowsill in a 1/2 gallon planter.

Tiny Lemon Balm seeds.

A root clump salvaged from the massacre site.
Step 3: Plant it!
Lemon Balm can be grown from seed, but it grows very quickly from root clumps. If you spot some feral Lemon Balm growing in your neighborhood, you can dig up a clump and start a patch in your own yard (Lemon Balm is frequently found in vacant lots, but be sure that you aren't digging up a cared-for patch). For seed starters, I prefer either a local seed company or Botanical Interests, not only because they have high sustainability standards, but their packages are both informative and beautiful! Lemon Balm, like other mints, have super tiny seeds that are simply pressed into the surface of your loosened dirt. Gently water your seed bed, being careful not to scatter those little seeds.

Much better!
Step 4: Take Care
Seeds germinate in 10-15 days. They can be thinned to 12" apart when 1" tall, but it's not necessary. Root clumps should take off quickly. Use the leaves as needed. Lemon Balm can be severely cut back and will happily return. When I find a large patch of feral Lemon Balm, I cut back whole stalks (3'-4' tall) and hang it upside down in big bunches to dry. If it's still early in the season, they'll grow right back!
Since Lemon Balm leaves can be picked as needed, next week I'll share some of my favorite Lemon Balm recipes, like my Sweet Meadow Smoke Blend:

*This information has not been evaluated by the FDA and does not replace the opinion of a doctor. This product is not intended to diagnose, treat, cure, or prevent any disease.